OnBoard - User Research Project
Project Brief
Board administrators are currently working to diversify their boards to better represent the community they serve, but they find that they're only recruiting within their own circles which limits their candidate diversity.
Team leader

Michael Fitzgerald
Sr. Product Manager

Jarred Porter
Associate Product Manager
Approach
We researched board-matching software services that shared the same goals, objectives, and customer base for this OnBoard marketplace and found ways to make it stand out. Through a SWOT analysis, we found strengths and weaknesses of each of these services so that our newly designed marketplace can best serve its needs. We also looked into two of OnBoard’s current competitors that exclusively manage the inner workings of their board through these software. Additionally, there is a feature key which highlights some important features that we wanted to focus on when working on our final design. A summary of the analysis can be viewed on the next page.
Journey Mapping
We took what we learned from our research and competitive analysis to create a tentative journey map to get a better understanding of board administrators and their goals throughout the process of recruiting new board members.
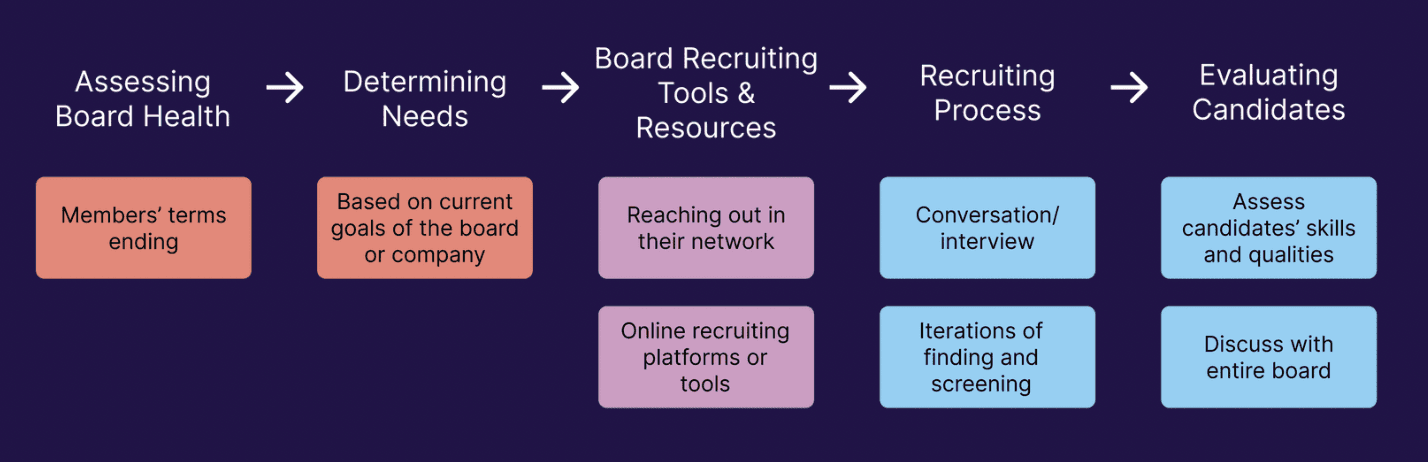
The journey we developed took us through five broad stages in the process of recruiting.
1. Assessing Board Health This involves looking over the current makeup of the board, including seeing if any current board members’ terms are ending.
2. Determining Needs From their board assessment, they would then determine what they are looking for in a new board member. Based on the current goals of the board or the company, they might look for candidates with a specific skill set that would help them achieve these.
3. Board Recruiting Tools & Resources There are many resources online or within companies that may help boards through different steps in the recruiting process. As seen from our competitive analysis, there are various online board recruitment services that tailor to different needs. Based on our interviews, boards often look in their company or current network to find candidates or recruitment help.
4. Recruiting Process From their resources, boards may reach out or be provided with interested candidates for their board. This starts the long process of finding, interviewing, and screening these people.
5. Evaluating Candidates Once they have chosen and learned more about their candidates, boards would then assess candidates’ skills and qualities, seeing if they would be a good fit within their board. Those directors within the recruiting process commonly bring information about these potential candidates to review with the rest of the board. This allows them to get the entire board’s thoughts and opinions.
Searching & Filtering
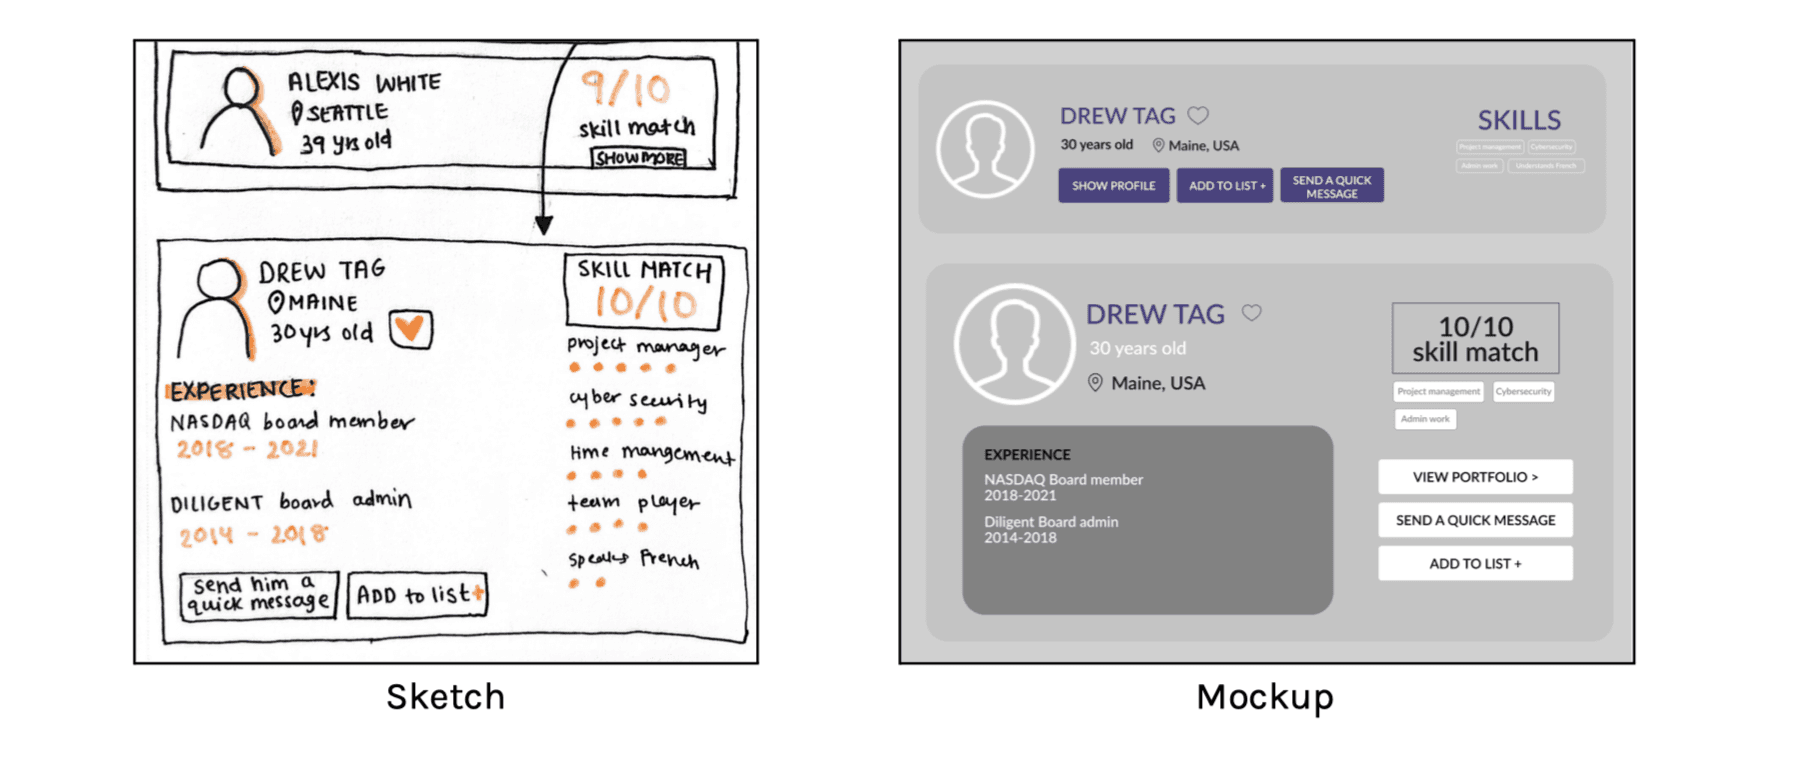
Profile Views
Much of our research focused on the information boards look for in candidates, therefore it was very important to design how a candidate’s profile is viewed well. Skills and experience were two criteria we found boards look at. Additionally, there are quick actions on these profiles for administrators’ convenience.
Scenario Testing Evaluations
Goals
● To evaluate the newly designed Navigation meets the expectations of actual use.
● Find out what you want to preserve for filtering options
● Test design concepts for new features
● What is the next step for design improvement
● Look for features that users want to add
Approach
We reached out to 5 OnBoard employees to conduct virtual user testing with the Figma mock-ups. The protocol can be found in Appendix C.
● System Usability Scale (SUS): Providing a “quick and dirty”, reliable tool for measuring the usability.
● Scenario testing: It is based on testing our newly designed features with users and getting feedback to help provide direction for the next design improvements.
○ Task 1: Create and set up a new recruiting project ○ Task 2: Search through the candidate list and pick someone to set up an interview with.
○ Task 3: Add your notes about Drew Tag to the project
● Observation + Interview + Survey
System Usability Scale (SUS) Takeaways
Through the data of SUS scale, we can draw the conclusion that:
The experience of our new features isn't very complicated for 80% of respondents, only about 20% of them say it's a little complicated, 20% of those say it's not complicated overall, and some of the sub-features are a little complicated, like the workflow is a little clunky, and it's a little bad for new non-Onboard users, But for the most part, the experience is user-friendly and intuitive.
Therefore, for the majority of users' suggestions we have concluded; It can be difficult for new users to use for the first time, which is reflected in the details of the use of some of the sub-features, so there should be tooltips to help familiarize users with these features and systems quickly.
Final Design——OnBoard Connection
Explanation
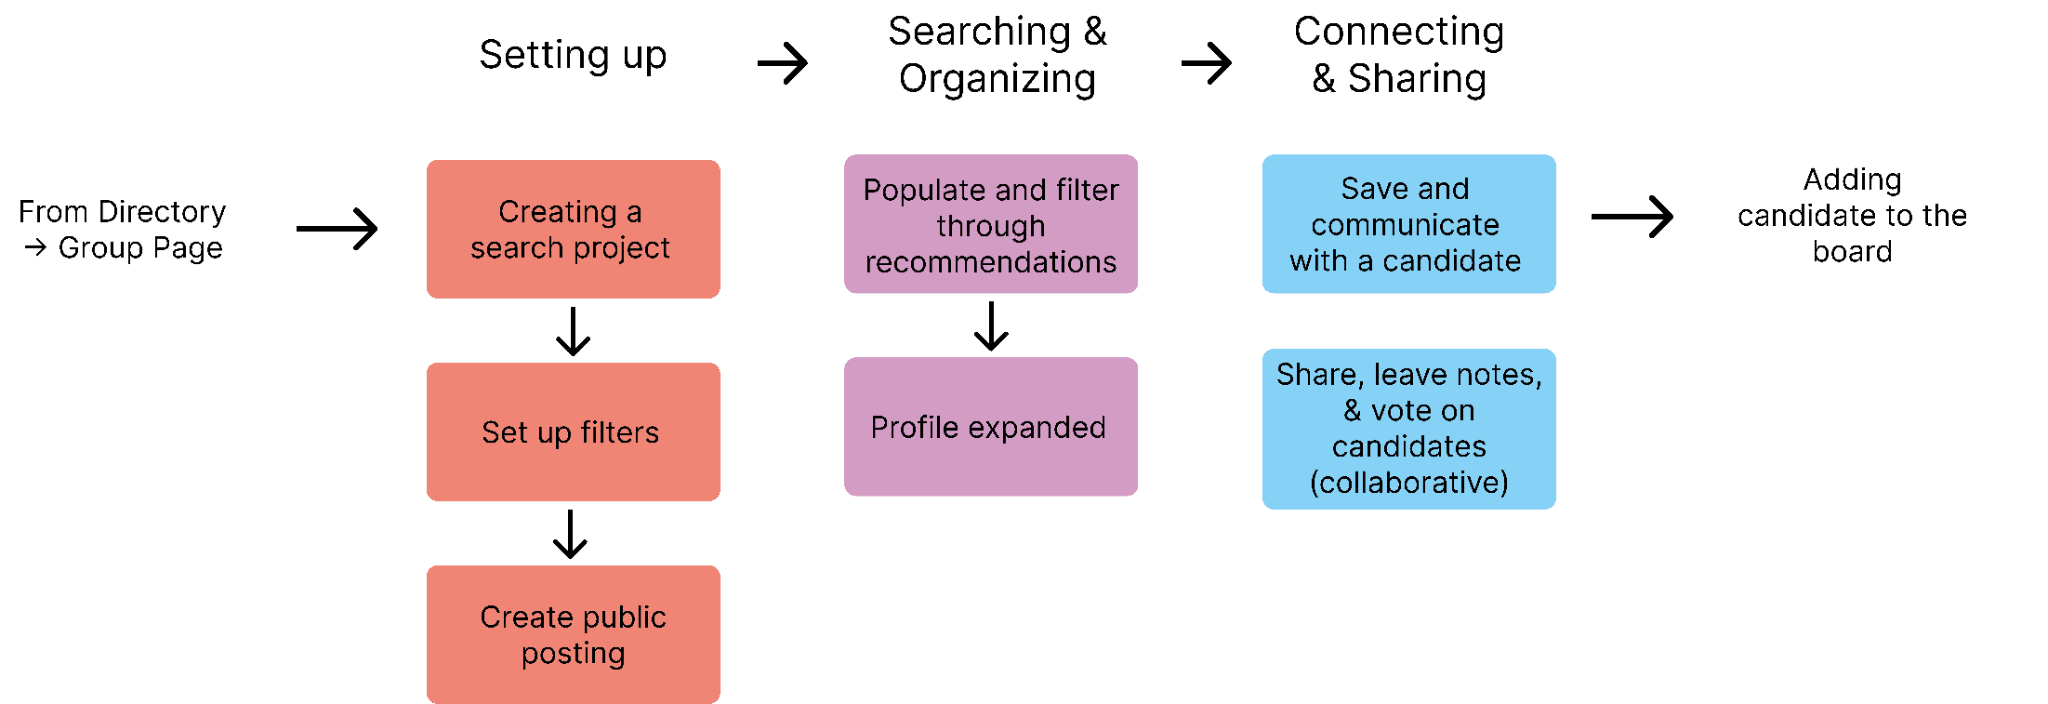
For our final design, we created wireframes to help Board Administrators find qualified people to fill board positions openings through a system we called, “OnBoard Connect”. The concept revolves around the new journey map we created below.
Revised Journey Map for Recruitment Process
Definitions
Project: a specific search among an actively recruiting board for a specific candidate to fill a board position based on specific skills or demographics.
Public Job Posting: an optional public member application that candidates can reach out through about their interest and learn more about the opportunity.
Setting up: Filters

Upon clicking the, “New Recruiting Project,'' button, the user will be taken to a page where they can set up filters through adding specific information about the potential candidate they are looking to hire. Users can add a project title, description, and filters such as skills, industry, board and work experience. The system will also generate “suggested skills” based on the information filled in and help users fill out on something they might have missed. There is also a, “Creator Notes” section where the user can fill in some important information that they want project collaborators to take a note of.
Connecting and Sharing: Save and Communicate with the Candidate
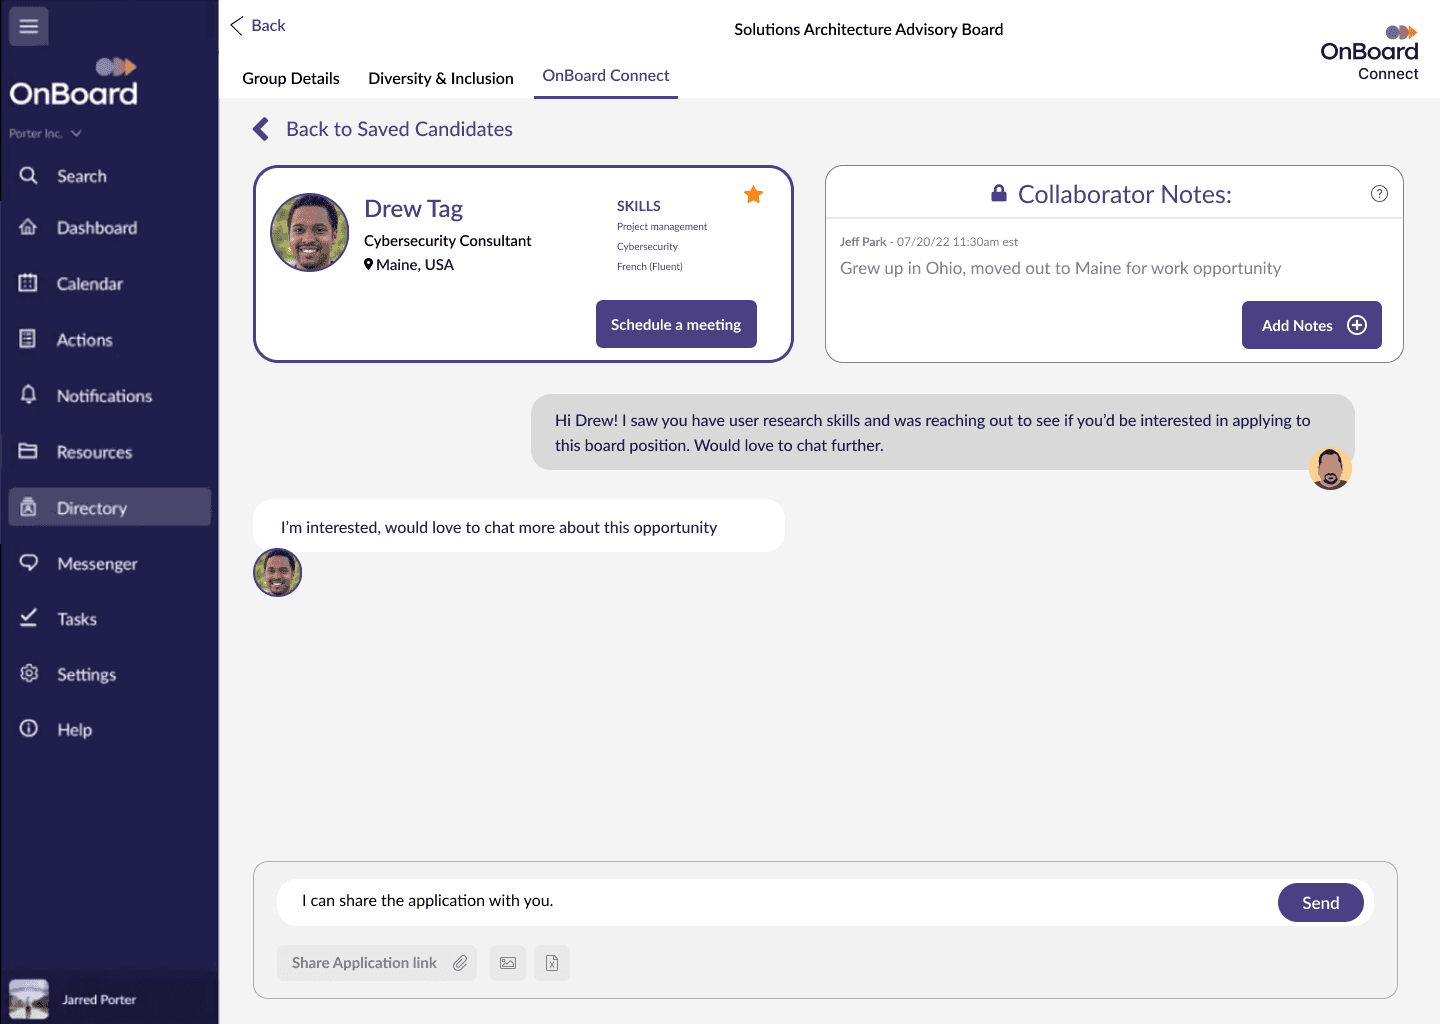
The user will be able to communicate directly with potential candidates through the messaging feature in order to get to know them more. The chat window will also display a quick overview of the candidate and collaborator notes to keep in mind while messaging the candidate. These two features will only be visible to the user and not the candidate.
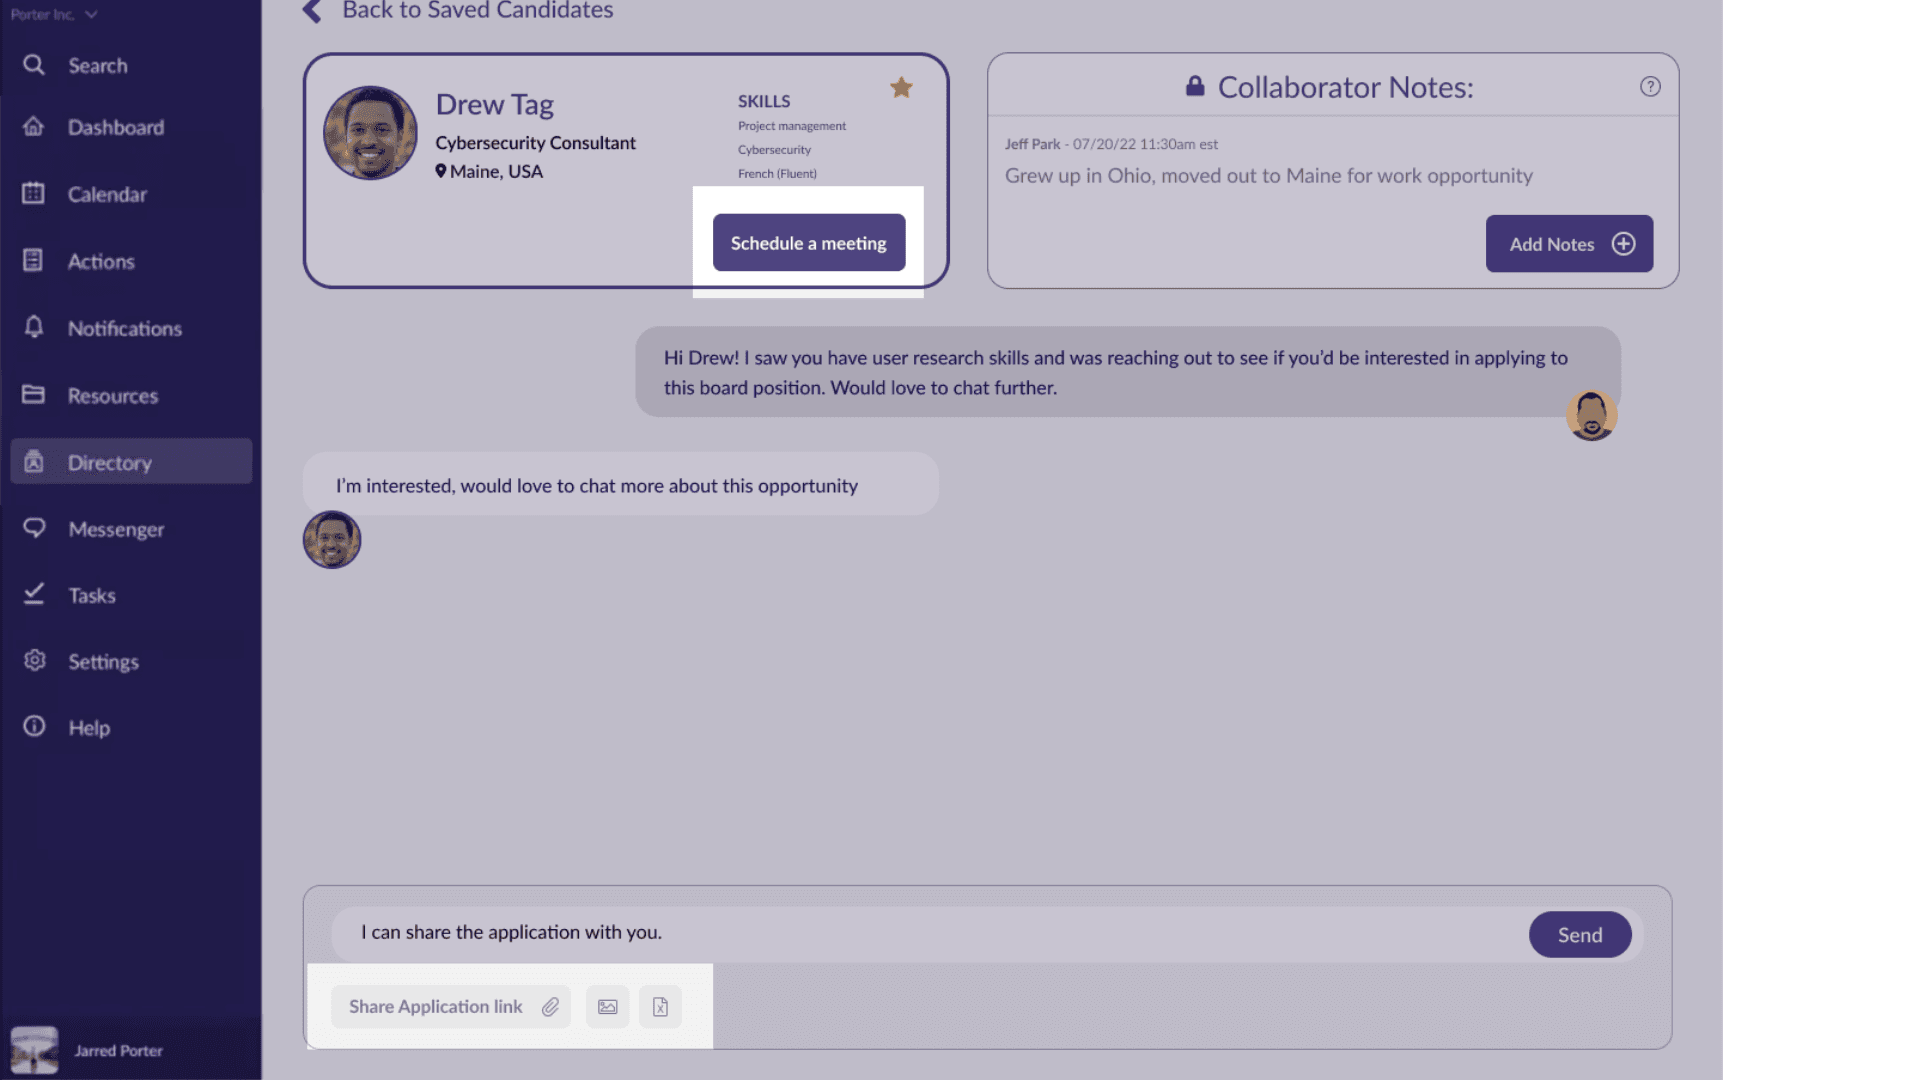
In the quick overview of the candidate profile, the user will be able to directly schedule a meeting with them if they are interested in interviewing.
with the name of the collaborator who added that note, and the date and the time stamps. After the main Administrator has initiated the voting process, the button will be changed to “Vote” and allow collaborators to vote for the candidate. It will also contain updates about which user initiated voting, who has voted, and, the time when voting ends.